本文主要介绍使用Python3 调用OCI SDK接口创建Oracle Cloud VM实例的方法。
1. 前言 最近才后知后觉知道Oracle Cloud有免费的云服务器可以申请,大家申请比较多的是韩国或日本地区的4核24G ARM主机,手工在网页申请总提示容量不足。简单研究了下看到Oracle官方提供了OCI工具,也提供了Java Python等语言SDK接口,话不多说,脚本撸起!
2. 模块安装 本机环境:Windows 10 + Python 3
Oracle oci模块,使用命令pip install oci安装即可
pypi地址:https://pypi.python.org/pypi/oci/
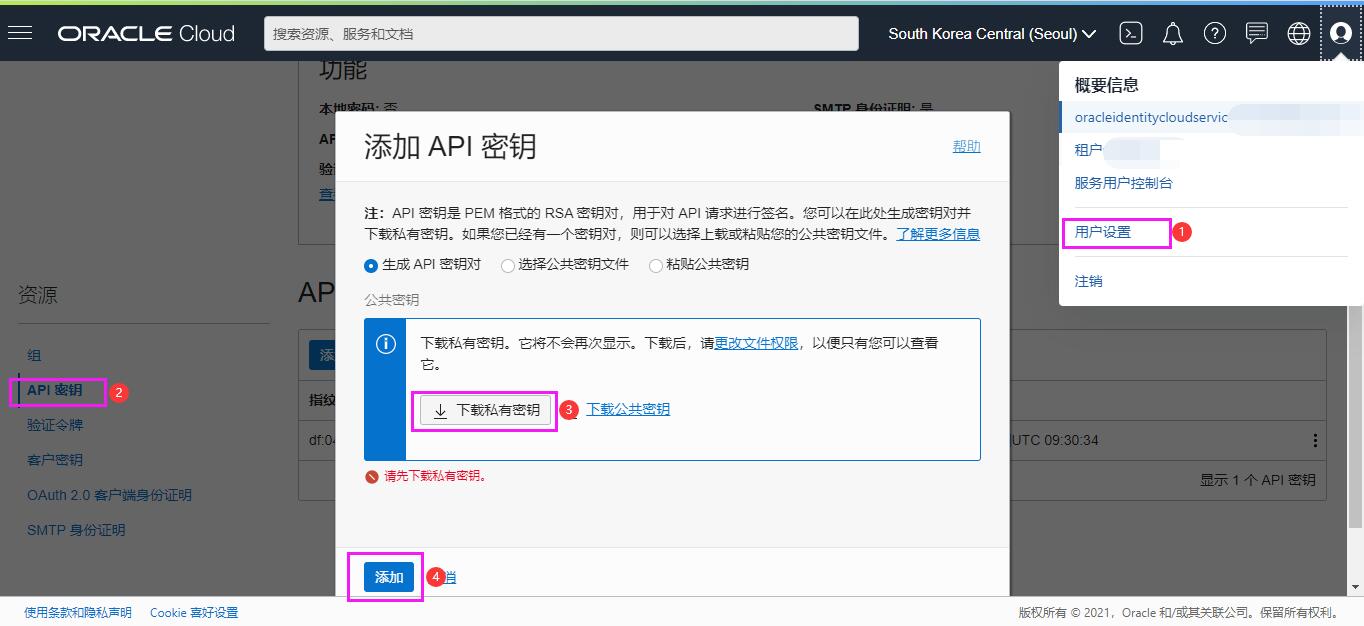
3. API密钥配置 1、登录Oracle Cloud账号后,右上角点击账号后选择 “用户设置” -> “API密钥” -> “添加 API 密钥” -> “下载私有密钥” -> “添加”,此时系统会生成API秘钥对用以用户鉴权。
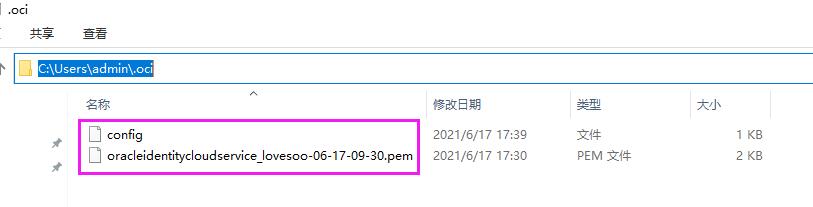
2、本地新建~/.oci/config文件(我的路径为C:\Users\admin.oci\config),在最后一步生成的配置文件拷贝至config文件中
3、将下载的私钥拷贝至同一目录下,打开config文件,修改最后一行key_file内容,填写私钥的本地绝对路径
4. 账户验证 配置好config文件之后,可以运行官方提供的示例代码,校验用户鉴权是否成功,此代码是调用用户接口新增一个名为TestUser的账户。
其中endpoint url需要修改为你申请账户所在区域的地址,如韩国首尔地址 https://identity.ap-seoul-1.oraclecloud.com/20160918/users/
1
2
3
4
5
6
7
8
9
10
11
12
13
14
15
16
17
18
19
20
21
22
23
24
25
26
27
28
29
30
# coding: utf-8 # Copyright (c) 2016, 2020, Oracle and/or its affiliates. All rights reserved. # This software is dual-licensed to you under the Universal Permissive License (UPL) 1.0 as shown at https://oss.oracle.com/licenses/upl # or Apache License 2.0 as shown at http://www.apache.org/licenses/LICENSE-2.0. You may choose either license. import requests from oci.config import from_file from oci.signer import Signer config = from_file() auth = Signer( tenancy=config['tenancy'], user=config['user'], fingerprint=config['fingerprint'], private_key_file_location=config['key_file'], pass_phrase=config['pass_phrase'] ) endpoint = 'https://identity.us-phoenix-1.oraclecloud.com/20160918/users/' body = { 'compartmentId': config['tenancy'], # root compartment 'name': 'TestUser', 'description': 'Created with a raw request' } response = requests.post(endpoint, json=body, auth=auth) response.raise_for_status() print(response.json()['id'])
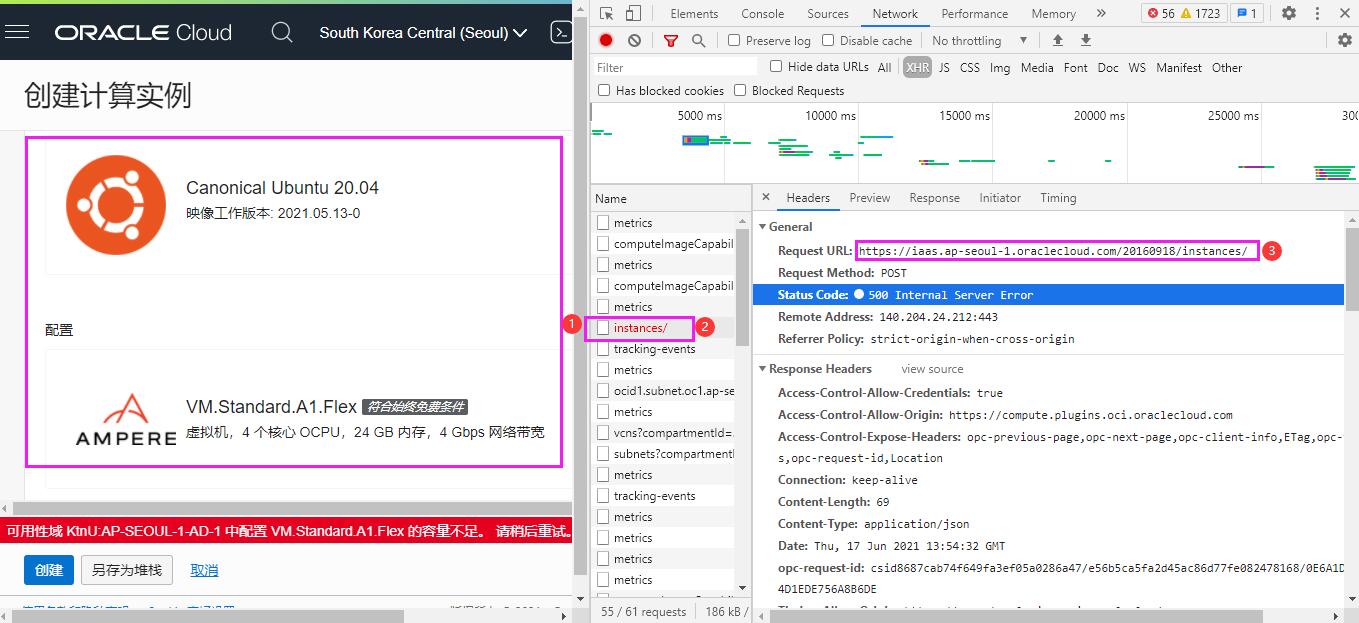
5. 创建VM实例 在页面上创建VM实例,配置好申请的系统及配置(如Ubuntu, ARM 4核24G),打开浏览器F12调试窗口,点击“创建”按钮,此时会提示容量不足,申请失败。
找到名为 instances/ 的请求,可以看到此接口报错500,Response是{‘code’: ‘InternalError’, ‘message’: ‘Out of host capacity.’},拷贝请求URL:https://iaas.ap-seoul-1.oraclecloud.com/20160918/instances/
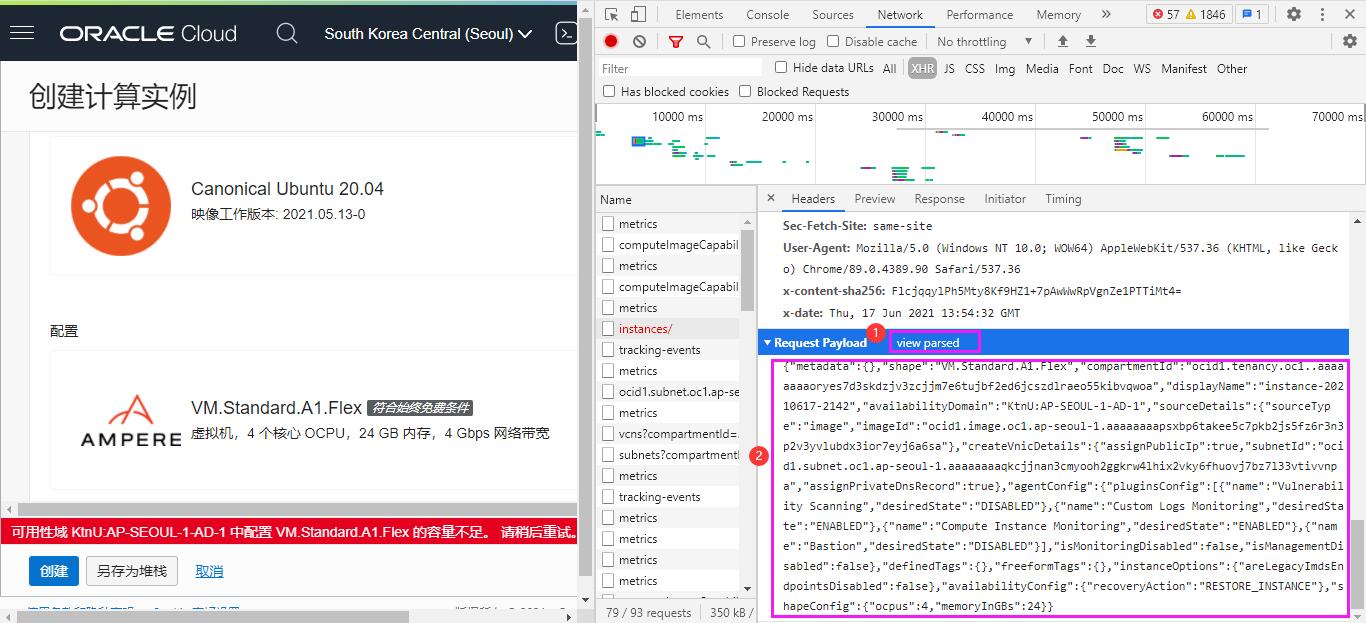
下拉找到Request Payload,点击 view source,拷贝完整的请求体,至如下代码body中 (注意替换代码中的true为True,false为False):
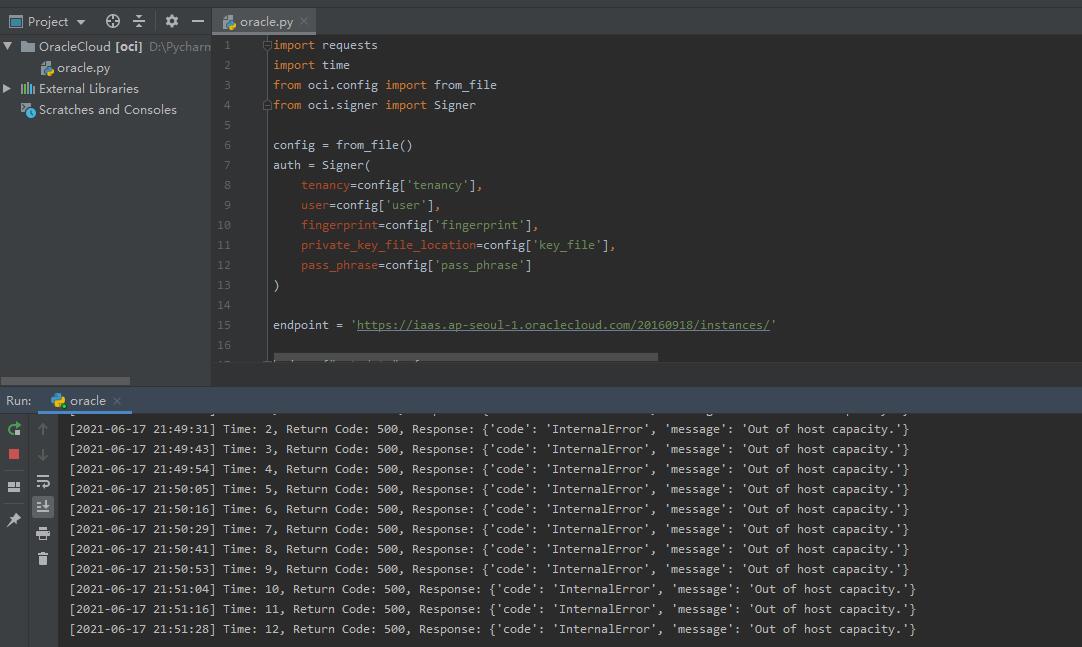
1
2
3
4
5
6
7
8
9
10
11
12
13
14
15
16
17
18
19
20
21
22
23
24
25
26
27
28
29
30
31
32
33
34
import requests import time from oci.config import from_file from oci.signer import Signer config = from_file() auth = Signer( tenancy=config['tenancy'], user=config['user'], fingerprint=config['fingerprint'], private_key_file_location=config['key_file'], pass_phrase=config['pass_phrase'] ) endpoint = 'https://iaas.ap-seoul-1.oraclecloud.com/20160918/instances/' body = { } # add body here i = 1 while True: response = requests.post(endpoint, json=body, auth=auth) print("[{}] Time: {}, Return Code: {}, Response: {}".format( time.strftime("%Y-%m-%d %H:%M:%S", time.localtime()), i, response.status_code, response.json())) if response.status_code == 200: break else: i += 1 time.sleep(10)
运行代码,即可间隔10s循环请求调用OCI接口申请ARM VM实例。
6. 参考文档 https://www.cnblogs.com/steinven/p/14786012.html https://www.bobobk.com/612.html https://docs.oracle.com/en-us/iaas/Content/API/Concepts/signingrequests.htm#seven__Python